You can stamp records created or updated by app users with the ID of the creator. For example, in a ticket management app, you can stamp a record with the ID of the person who created or last updated it.
Currently, this feature is available for Submission and Details/Update Forms.
Stamping records with the user ID of the creator or modifier
The following example shows how to stamp a record with the ID of the user who created it with a Submission Form or who modified it with a Details/Update Form. For this purpose, you use a Hidden form element, which saves the user ID in the table field.
To do this, you create a relationship between the UserGUID field from a directory and the CreatedBy or the ModifiedBy field from the “Support_portal_tickets” table. As a result, UserGUID will be saved in the selected field in the “Support_portal_tickets” table.
Steps
- From the left menu, select Tables.
- Create the tables to store users and tickets, for example, the “Directory_support_portal” and “Support_portal_tickets” tables.
- On the Tables page, click Relationships.
- Create a one-to-many relationship between the UserGUID field in the “Directory_support_table” and one of the fields in the “Support_portal_tickets” table:
- If you want to stamp records with the user ID of the person who created it, create a relationship with the CreatedBy field.
- If you want to stamp records with the user ID of the person who modified it, create a relationship with the ModifiedBy field.
Example for the CreatedBy field: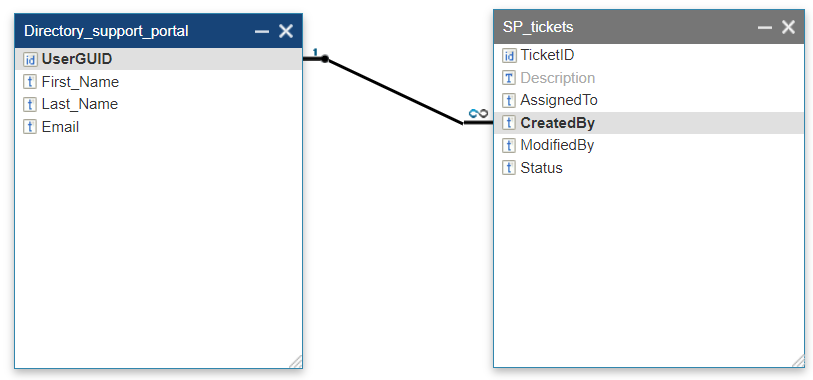
- In the relationship settings, in the Display Value list, select a field with a meaningful value, such as an email address, to use instead of a user ID, as shown in the following example for the CreatedBy field:
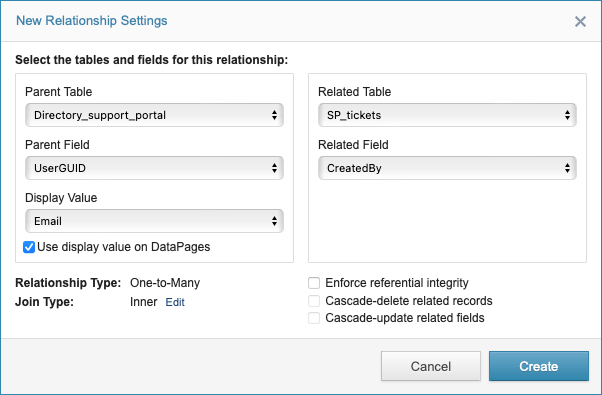
Note: As a best practice, use UserGUID rather than Email for establishing relationships because UserGUID remains constant while an email address can change.
- From the left menu, select Applications.
- On the Applications page, click the Designer tab, and then select an app.
- In your app, create or edit a form that will stamp the records.
- In the Configure fields step, in the Elements section, select the field where you want to store the user ID, for example, the CreatedBy or the ModifiedBy field.
- On the General tab, in the Form element list, select Hidden.
- In the Default value field, add an Authenticated user field parameter, and then select the field to pass the user identification data, for example, UserGUID.
The following figure shows sample configuration for the CreatedBy field: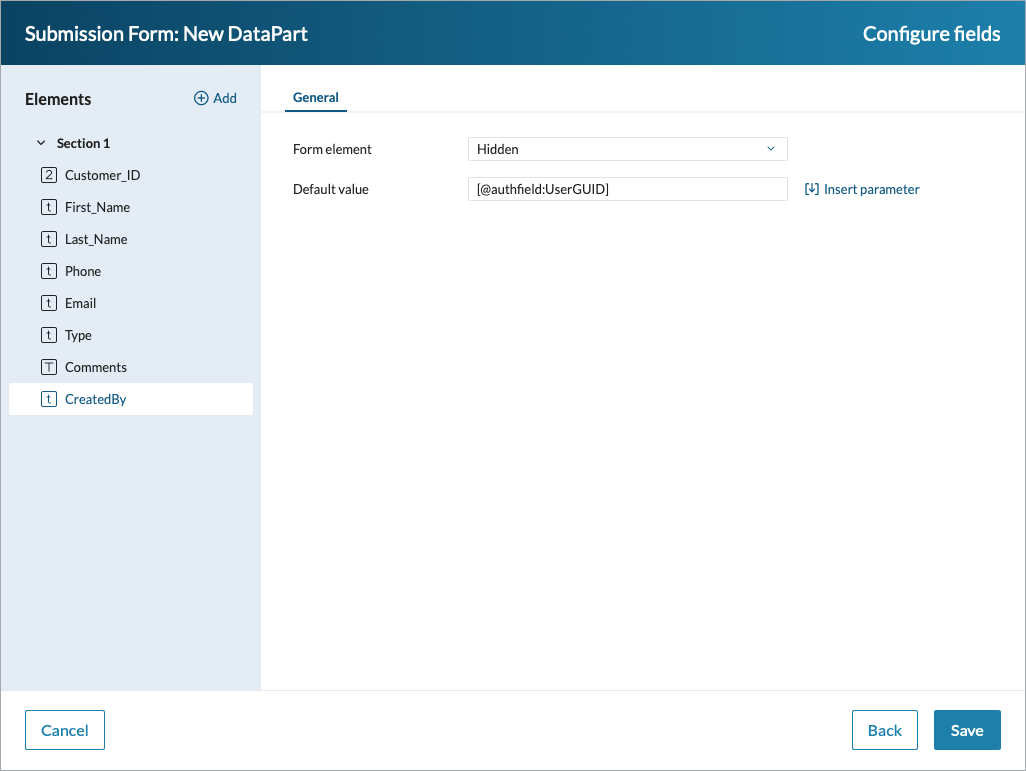
Result: The UserGUID of a person who creates or modifies a record is saved in the table field. You can use this setup to control access to the stamped records based on user roles.