You can insert parameters into the following areas of DataPages:
- HTML blocks in DataParts
- HTML/Text DataParts
- email notifications in Submission and Sign-up Forms, both in the message body and “To” field.
There are two ways to insert a parameter in your DataPart:
- Using a parameter picker
- entering them manually as text.
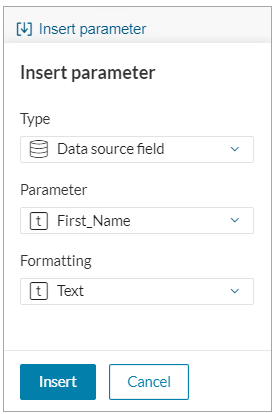
To use a parameter picker, select the Insert Parameter icon that is available in all DataParts where parameters are available. Then, from the dropdown, select the parameter type and its value. Depending on the field's data type, multiple formatting options may be available.
Formatting parameters
When using the parameter picker, the relevant formatting options are available. For example, if you want to display the parameter output as long date, you can use [@field:Day_of_Birth~]. On the other hand, if you want to use a short date format, you can use [@field:Day_of_Birth*].
The parameters are localized based on the DataPart localization settings. You can change it on the Segment level.
For more details, see the table below. The sample output is based on English (US) localization and may differ if you use a different localization.
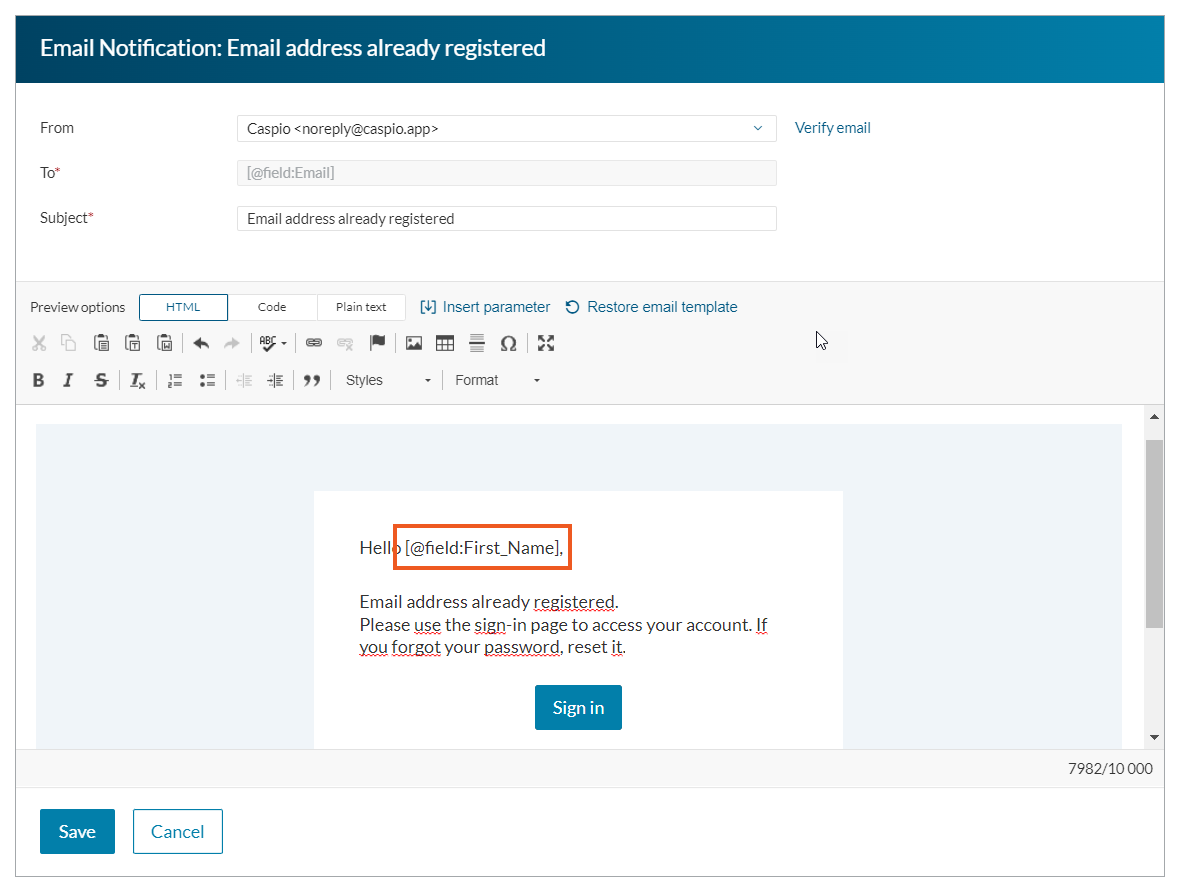
The following example shows adding a first name to the opening of an email message using a data source field parameter formatted as Text.
Supporting lookup values in data source parameters in Submission and Details/Update Forms
It is possible to display a data source value from a related table field when the relationship setup includes the Use display value on DataPages option. Thanks to that, in Submission and Details/Update Forms, the app author can refer to a Display field from a table relationship setup using parameters. This can be helpful, for example, in the ticketing system application to send email notifications to a person assigned to a given ticket.
For this use case, there should be a one-to-many relationship established between the tables storing the users and tickets. Then, when configuring a notification, in the To field of an email, you can select a data source field parameter and a display value for the field that stores assignees. As a result, an assignee will be sent an automatic email notifying about a new ticket.
Steps
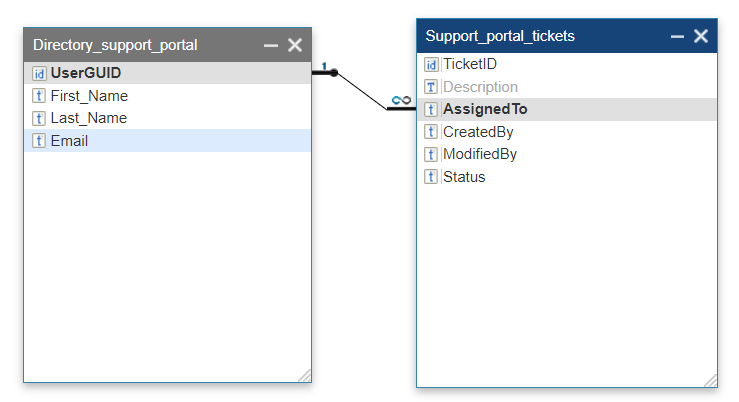
- Create tables that will store data for users and tickets. In our tutorial, we use the Directory_support _portal for ticket assignees and Support_portal_tickets for tickets.
- Create relatonship between the UserGUID and AssignedTo fields in the tables.
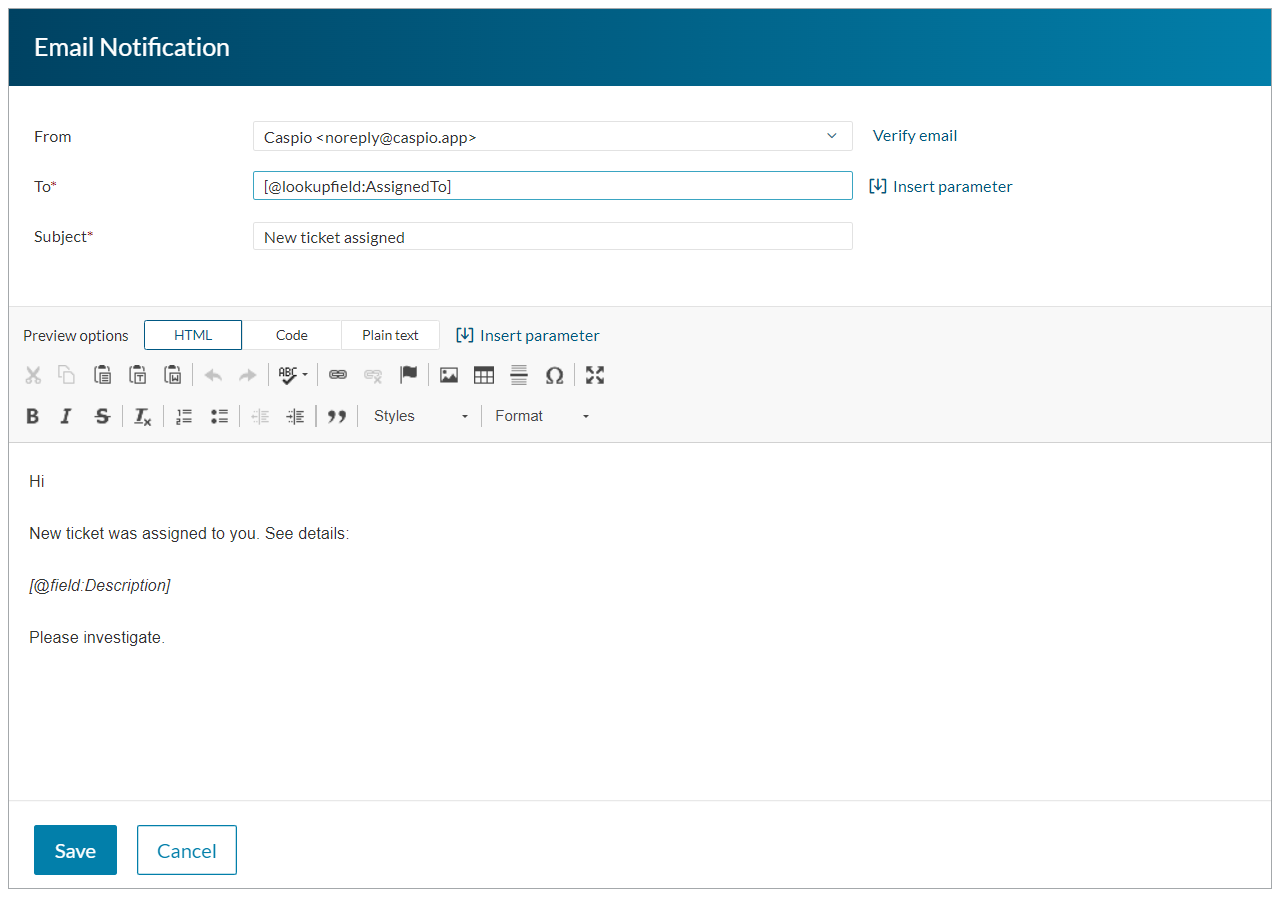
- Create or open a Submission Form to configure an email notification.
- In the Notification section, select Add.
- In the To field, insert a data source parameter for the AssignedTo field.
- Select Use display value.
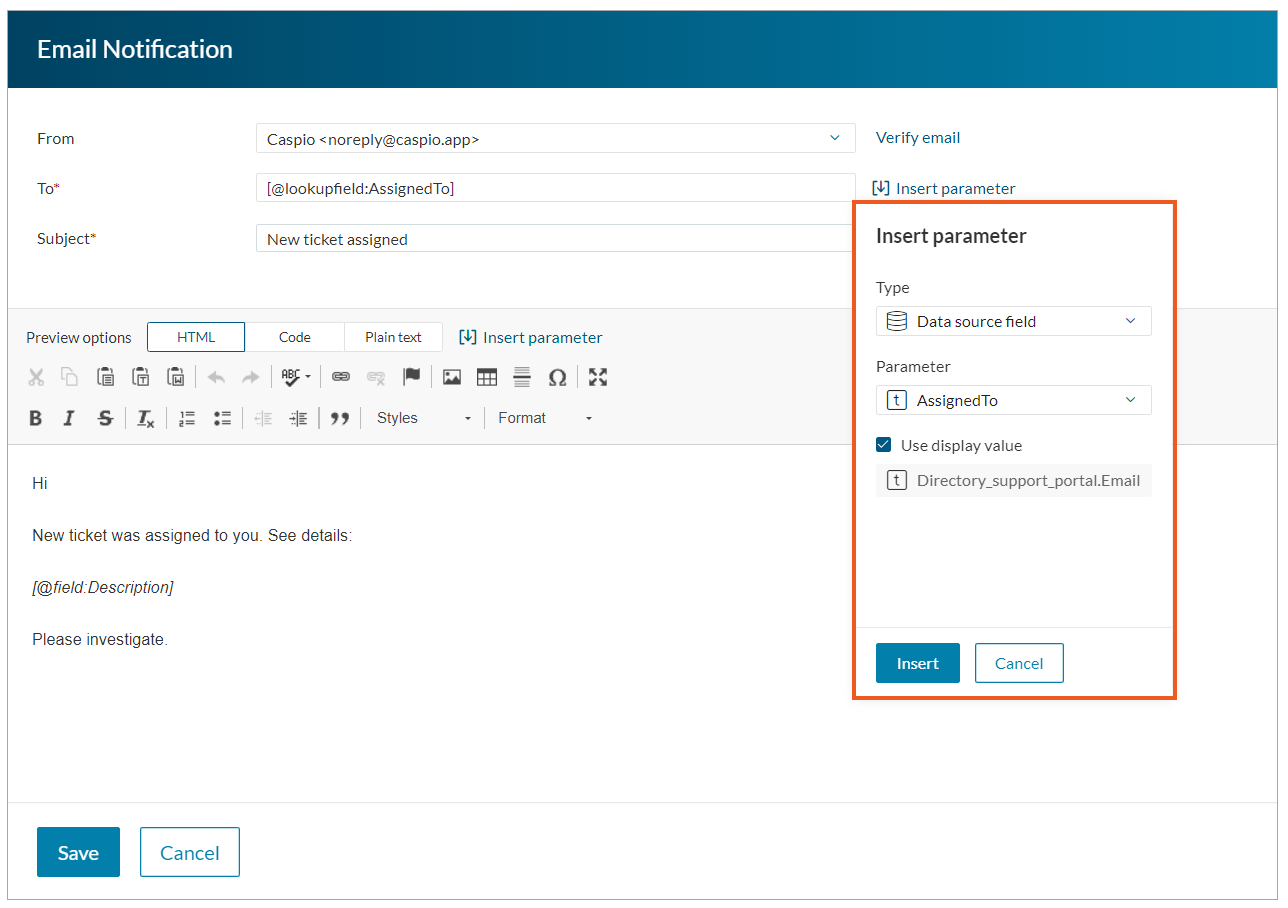
- Configure the email body.
- Select Save.