You can display a data source value from a related table field when the relationship setup includes the Use display value on DataPages option. As a result, in Submission Forms and Details/Update Forms, app authors can refer to a Display field from the table relationship setup using parameters. This functionality can be helpful, for example, in the ticketing system application to send email notifications to a person assigned to a given ticket.
This use case requires a one-to-many relationship between the tables storing the users and tickets. Then, when configuring a notification, in the To field of an email, you can select a data source field parameter and a display value for the field that stores assignees. As a result, an assignee will be sent an automatic email notifying them about a new ticket.
Additionally, using the same relationship, you can configure the Submission Form to stamp a new record with the ID of the user who was assigned to it. Learn more.
Steps
- From the left menu, select Tables.
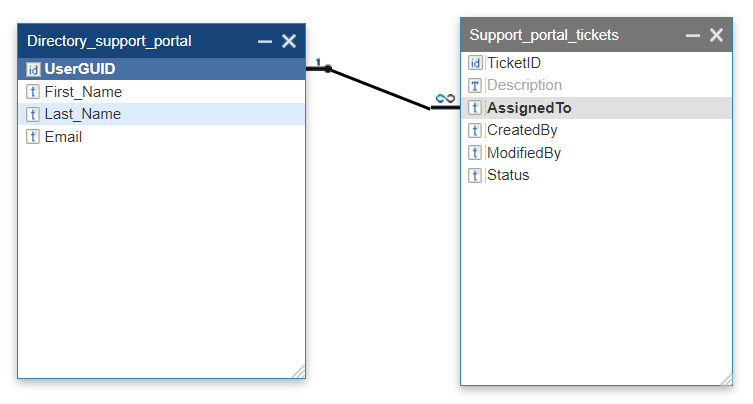
- Create the tables to store users and tickets, for example, the “Directory_support_portal” and “Support_portal_tickets” tables.
- On the Tables page, click Relationships.
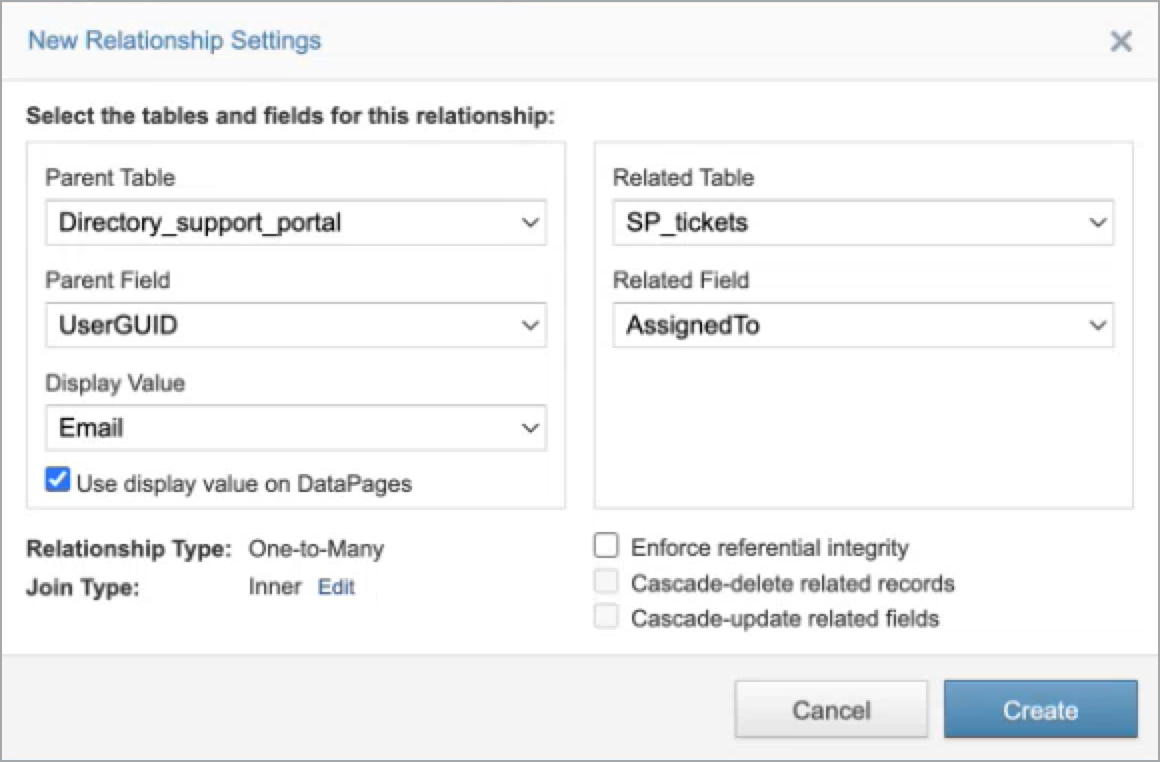
- Create a one-to-many relationship between the UserGUID field in the “Directory_support _portal” table and the AssignedTo field in the “Support_portal_tickets” table.
Note: As a best practice, use UserGUID rather than Email for establishing relationships because UserGUID remains constant while an email address can change.
- In the relationship settings, in the Display Value list, select a field with a meaningful value, such as an email address, to use instead of a user ID, as shown in the following example:
- From the left menu, select Applications.
- On the Applications page, click the Designer tab, and then select an app.
- In your app, create or edit a form that will stamp the records.
- In the Configure fields step, in the Elements section, select the field where you want to store the user ID, for example, AssignedTo.
- If you want to select a user from the directory as an assignee, use the following setup:
- Lookup table or view: Directory_support_portal
- Field for display: Email
- Field for value: UserGUID
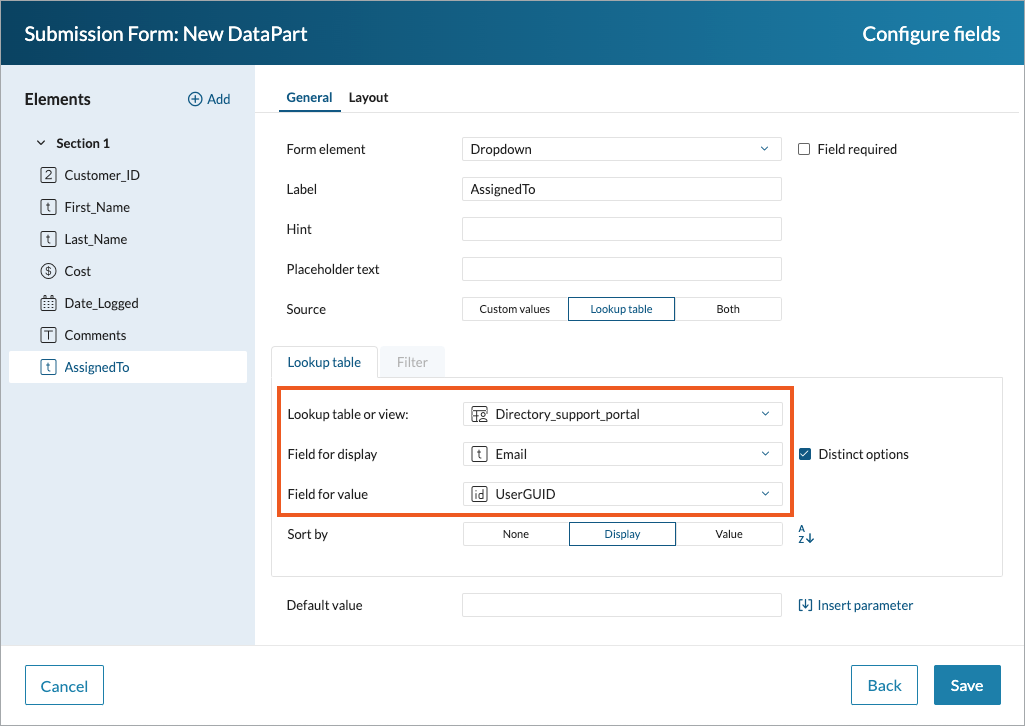
As a result, the UserGUID of a person who is assigned to an item is saved in the table datasheet. - Create an email notification:
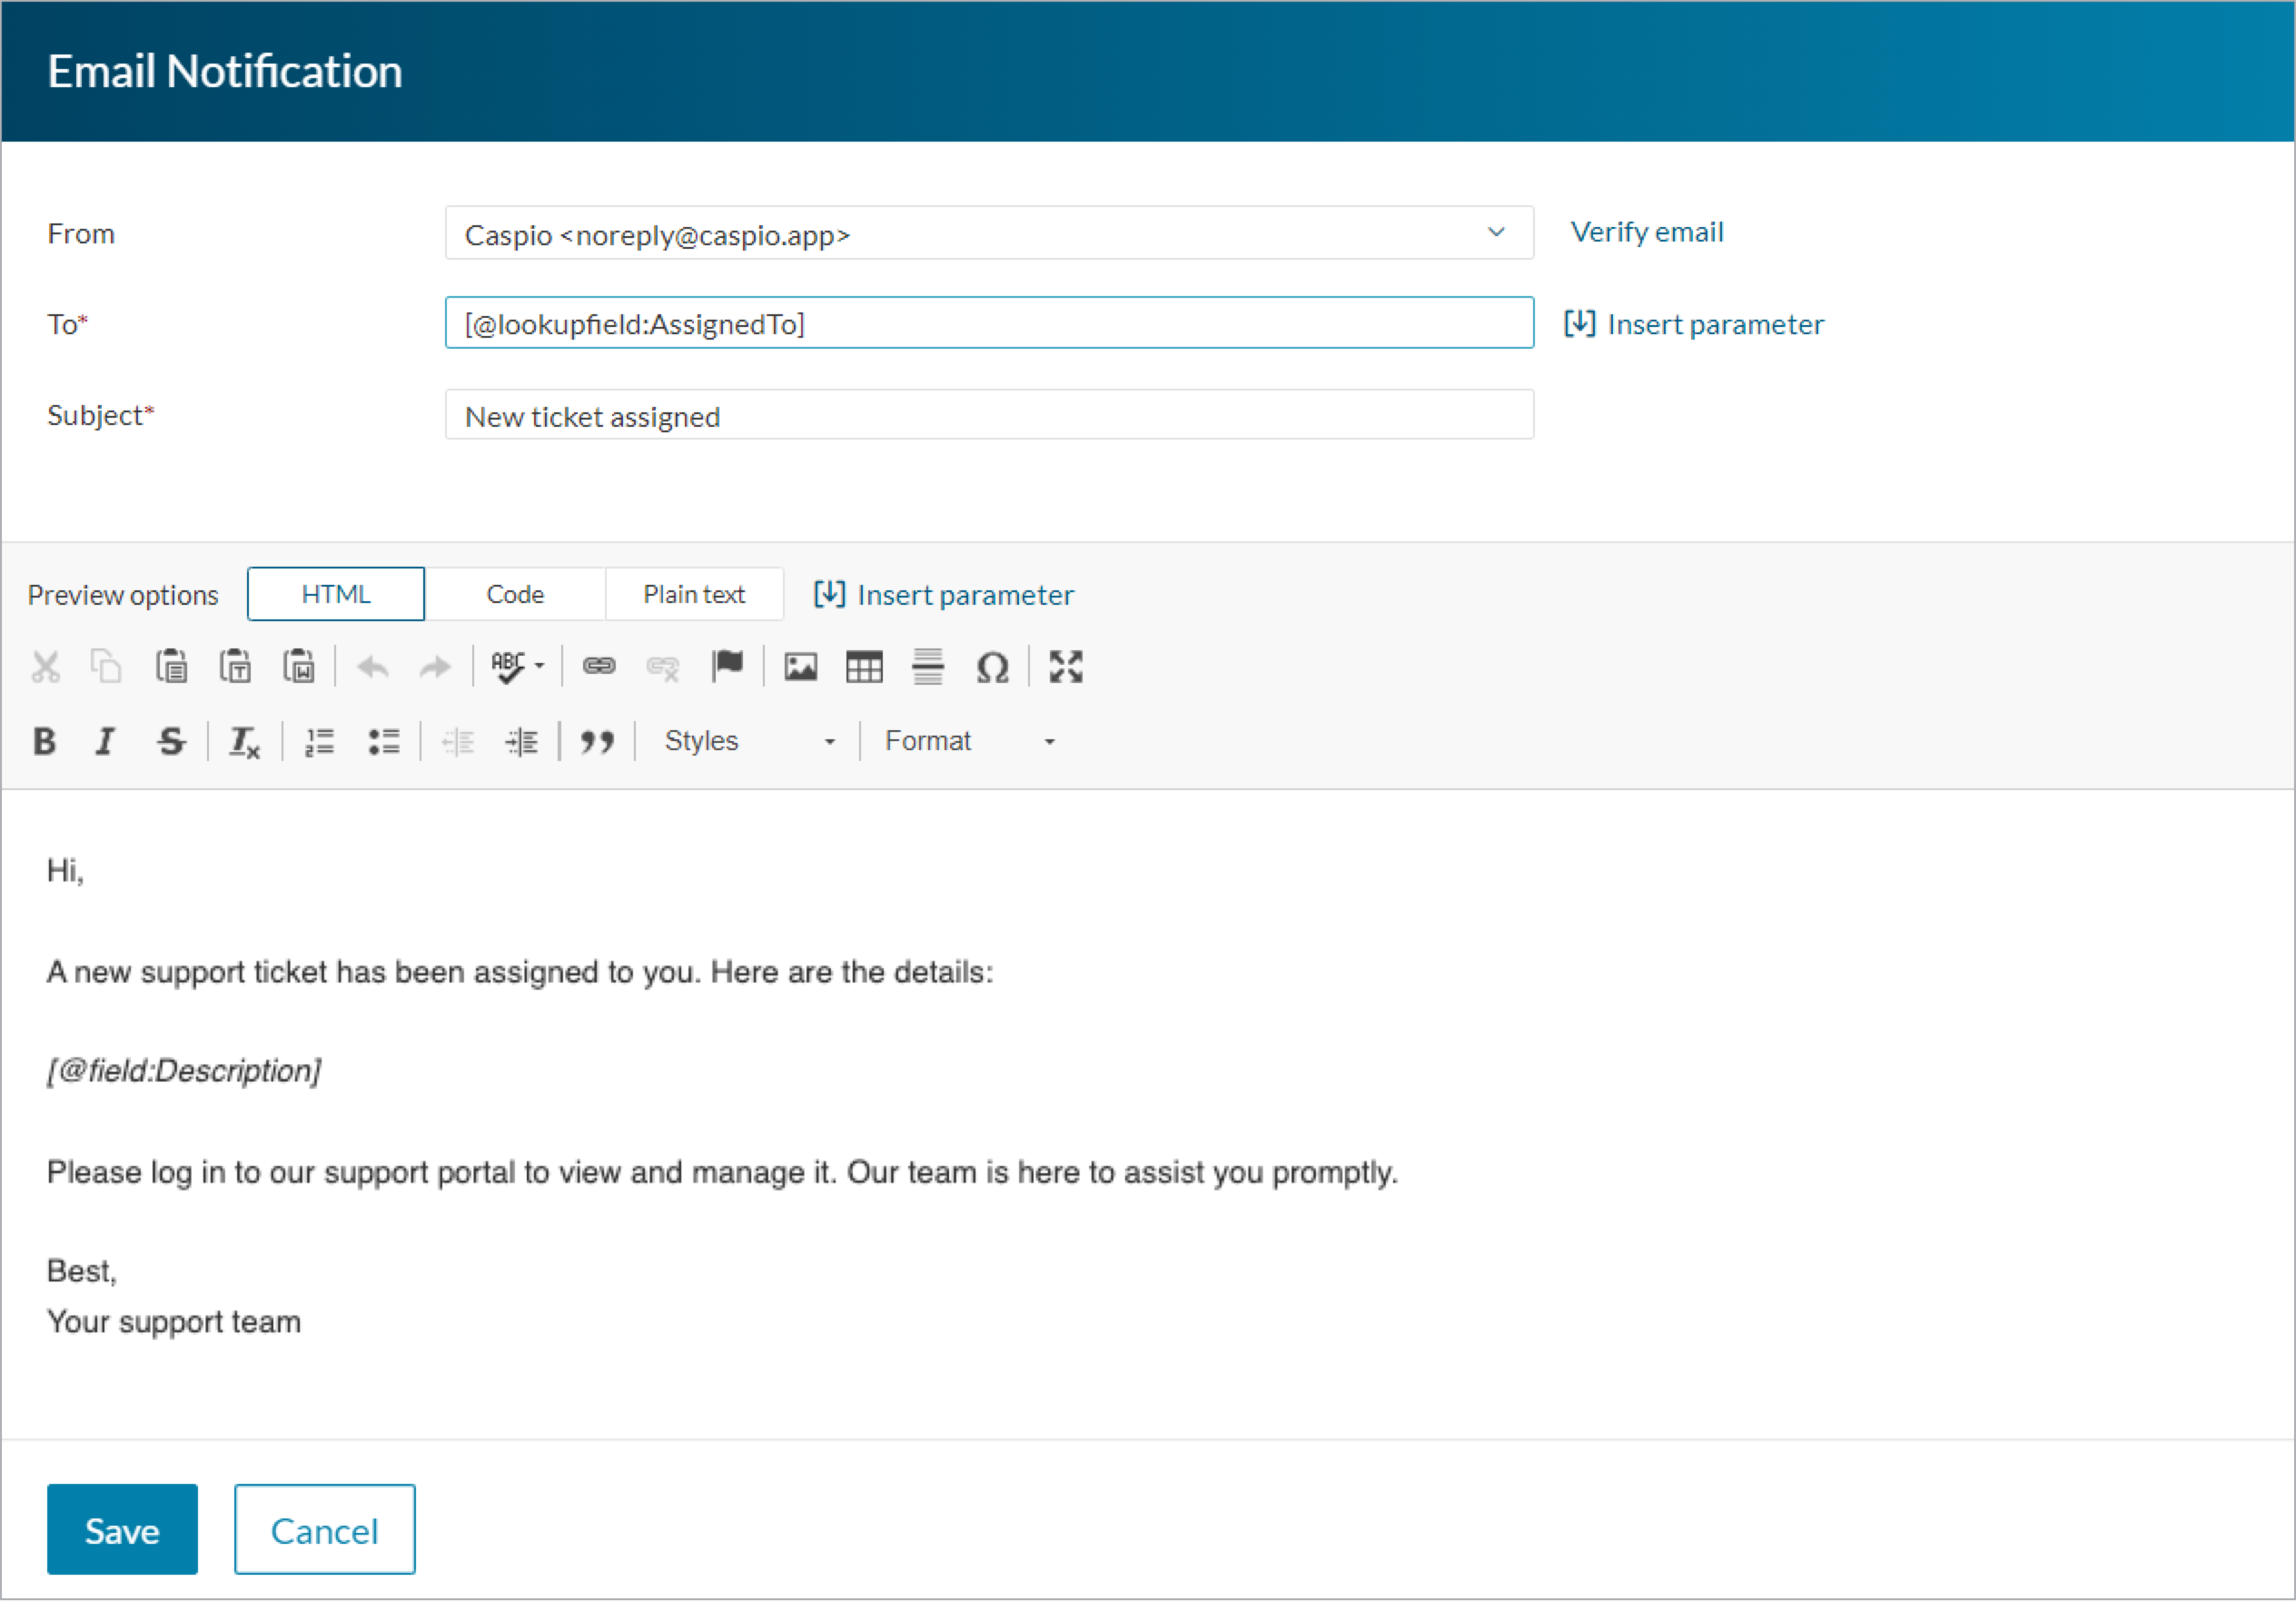
- In the Designer view, create or open a Submission Form.
- In the Notification section on the right, click Add.
- In the Email Notification dialog box, in the From list, select the sender address, for example, Caspio <noreply@caspio.app>.
- Next to the To field, click Insert parameter.
- In the Insert parameter panel, in the Type list, select Data source field.
- In the Parameter list, select the field that will provide the parameter value, for example, AssignedTo.
- Select Use display value, and then click Insert.
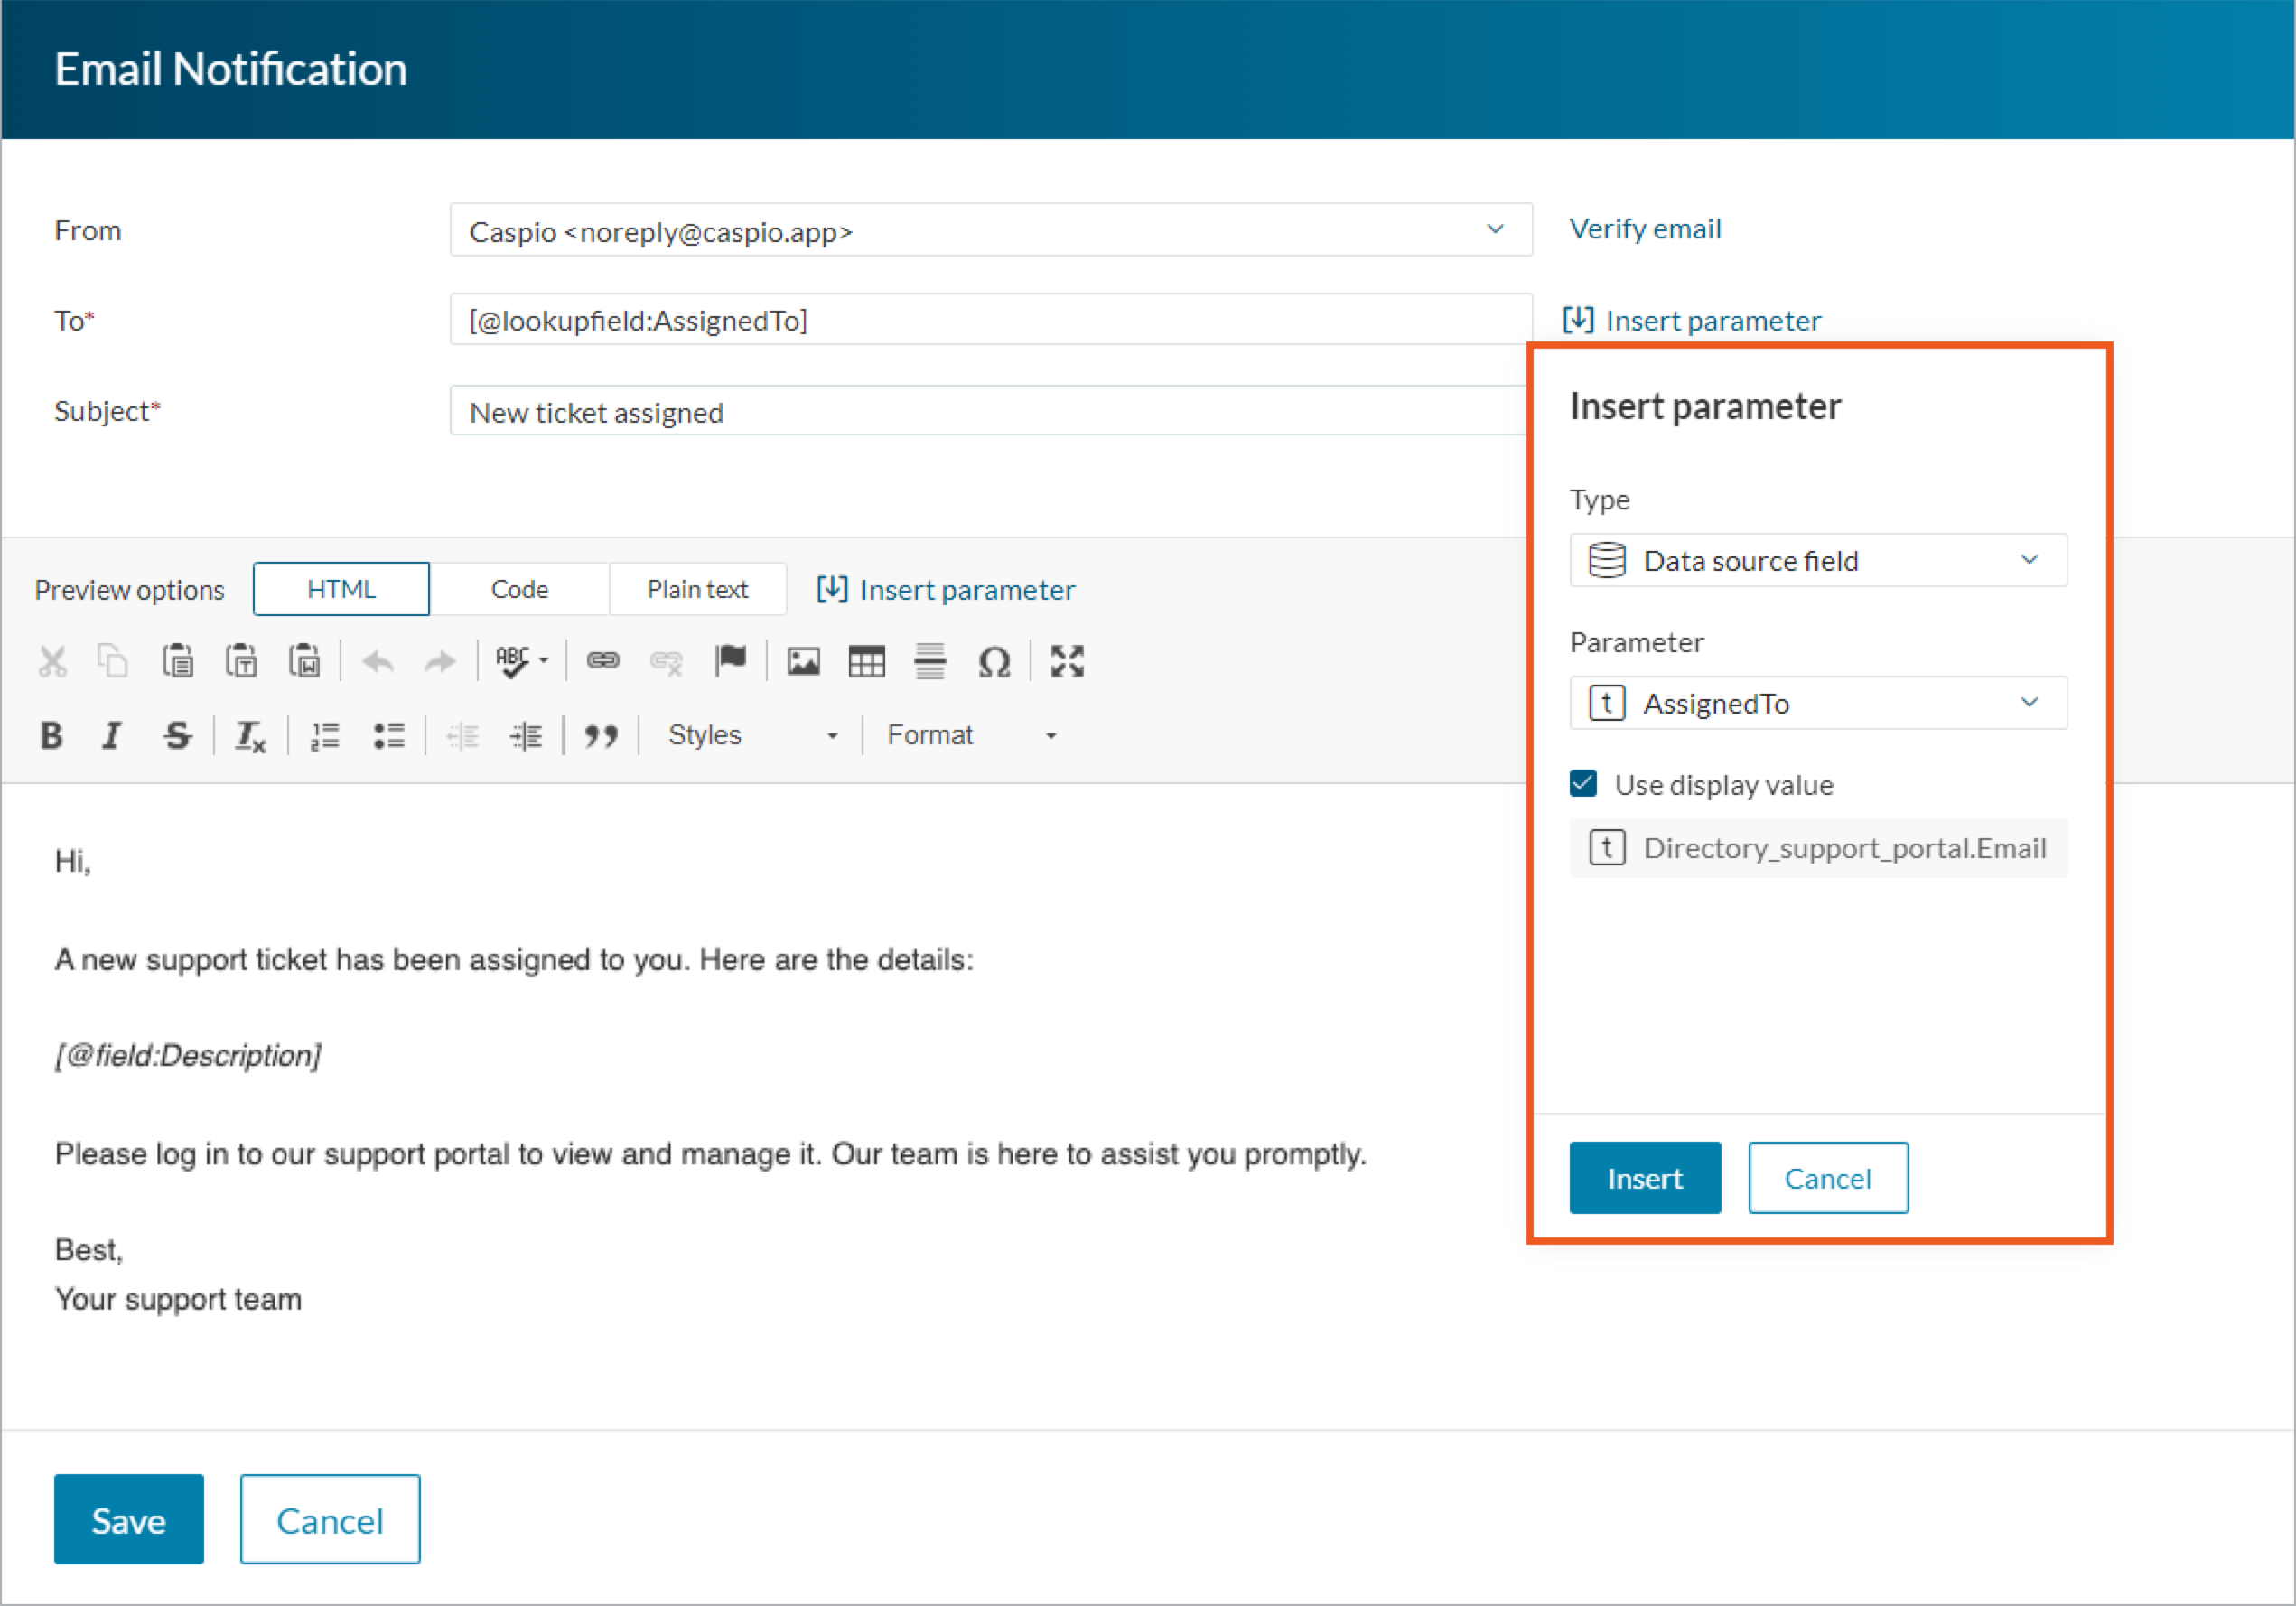
- Enter the subject and content of your email notification, and then click Save.
You can manage the records assigned to a user by setting up custom permissions.