A Sign-up Form allows users to self-register for your app. This type of form can be created with public access permissions. It is possible to assign a default role or group to all the users who registered with a particular Sign-up Form.
 During the sign-up process, app users need to provide an email address and password to submit the form. If a user with the provided email address does not exist in a directory, a user is inactive, or an activation link expired, app users receive an email with the activation link valid for 1 hour. If the app user clicks on this link after the specified time, or if they click on the link again after signing up, they will be directed to a page informing them that the link has expired or is invalid. If a user with the provided email address already exists in a directory and a user is active, app users receive an email with a link to reset a password.
During the sign-up process, app users need to provide an email address and password to submit the form. If a user with the provided email address does not exist in a directory, a user is inactive, or an activation link expired, app users receive an email with the activation link valid for 1 hour. If the app user clicks on this link after the specified time, or if they click on the link again after signing up, they will be directed to a page informing them that the link has expired or is invalid. If a user with the provided email address already exists in a directory and a user is active, app users receive an email with a link to reset a password.
Note: After seven days, the link is removed from the database, and when clicked, it navigates to the Page not found (404) error.Steps to create Sign-up Forms
- In the upper panel, select the Add elements button.
- Select User management > Sign-up Form.
- Select a directory to which a user should be assigned.
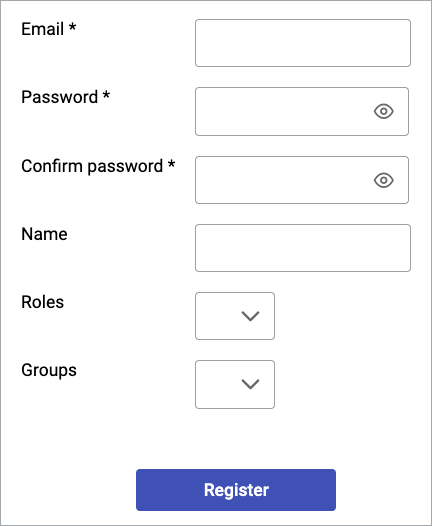
- The Selected fields section is by default filled in with the required Email and Password fields. From the Available fields panel, you can select additional fields you want to use in your form. To do that, click the field or drag and drop the fields into the Selected fields section. You can bulk-add all the fields by clicking the Select all button.
Note: For the Next button to be available, both the Email and Password fields must be selected.
- Optional: Configure sections in which you want to display groups of fields:
- In the Elements panel, click Add > Section and select the new section.
- On the General tab, enter the section heading and description to display on the form.
- On the Layout tab, select the number of columns in which you want to display the fields. The columns are of equal width.
- For each section that you want to display, repeat steps a. through c.
- Rearrange the order of sections using drag-and-drop.
- In the General and Layout tab, fill in additional parameters. The options available depend on the selected form element.