Caspio allows you to easily create forms that gather information from your users. After you deploy your form on a website, the information gathered is validated and stored in your data source.
Note: Only app users with permission to create new records in the data source table can submit a record.
Steps to create Submission Forms
- Select fields:
- In the upper panel, select the Add elements button.
- Select Forms > Submission Form.
- In the Data source panel, select a table or view that will be the primary data source for your DataPart.
Note: If a view is selected as a data source, records are submitted to a table marked as editable in the view configuration.
- From the Available fields panel, select the fields you want to use in your form. To do that, click the field or drag and drop it into the Selected fields section. You can bulk-add all the fields by clicking the Select all button.
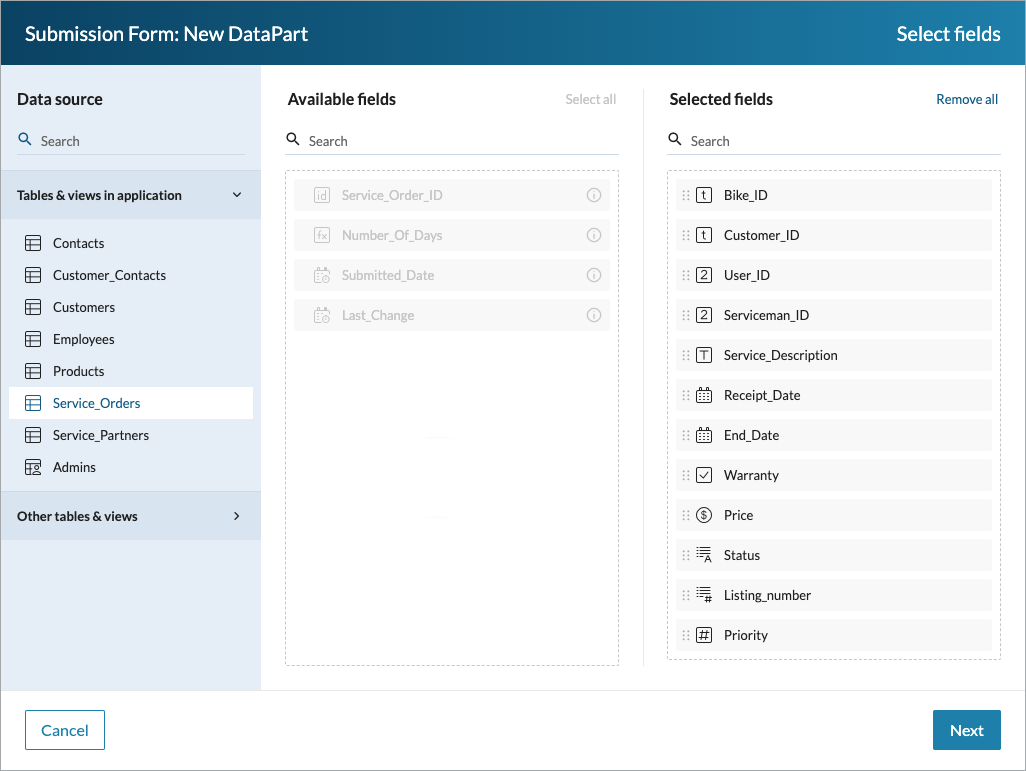
- Select Next.
Note: For the Next button to be available, at least one field must be selected.
- Optional: Configure sections in which you want to display groups of fields:
- In the Elements panel, click Add > Section and select the new section.
- On the General tab, enter the section heading and description to display on the form.
- On the Layout tab, select the number of columns in which you want to display the fields. The columns are of equal width.
- For each section that you want to display, repeat steps a. through c.
- Rearrange the order of sections using drag-and-drop.
- Configure fields:
- In the Elements panel, select a field.
- In the General and Layout tab, fill in additional parameters. The options available depend on the selected form element. Learn more.
- Rearrange the order of fields in sections and columns using drag-and-drop.
- Once the configuration is ready, click Save.
- Optional: Add an HTML block to your form to personalize it with such elements as headers, hyperlinks, or visuals:
- In the Elements panel, select Add > HTML block.
- Configure the block style and content. Learn more about HTML block.
After creating a Submission Form, in the right panel, you can edit its source and fields. This option may be helpful when you want to add or remove fields from a data source or change a data source to a different table or view.
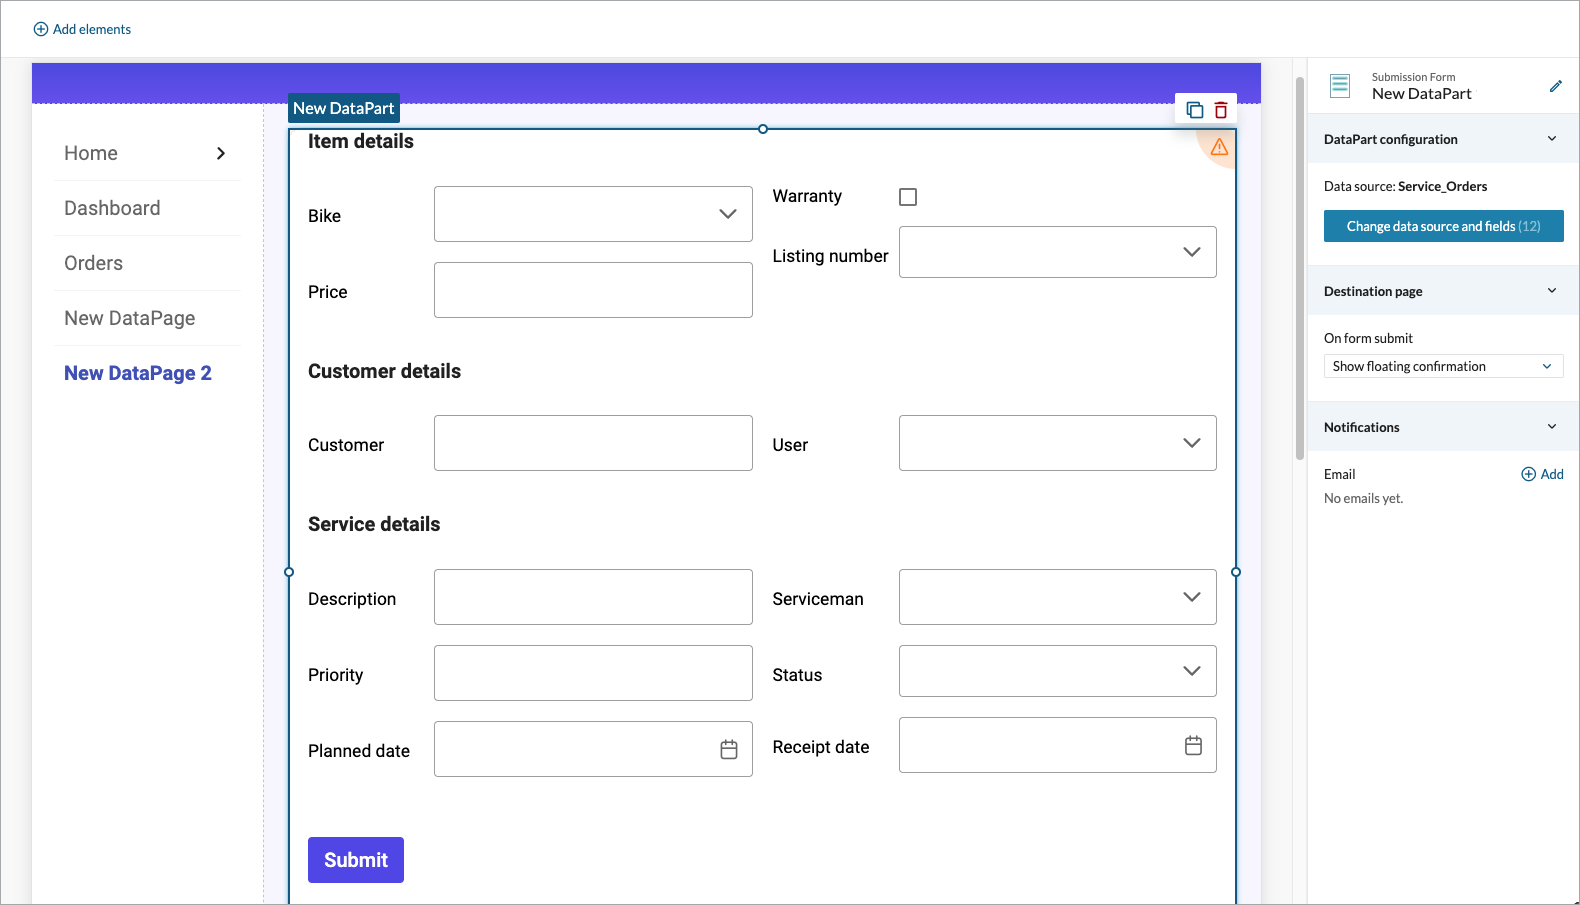
Configuring destination pages
Set up a destination page to which your users will be directed after form submission. You can choose to clear a form and display a pop-up message or direct users to a particular DataPage or URL. For instance, in the order management app, you can redirect a user to a list of orders after an order is added or updated.
To configure a destination page in your Submission Form:
- In the right panel, select Destination Page.
- From the On form submit dropdown, select a relevant option:
- Show confirmation pop-up – Clears form and displays a pop-up message.
- Go to DataPage – Directs the user to a specific DataPage. For this option, select a DataPage from the DataPage dropdown.
- Go to URL – Directs the user to a specific URL. For this option, enter an address in the URL field.
- Show custom confirmation page – Directs the user to a specific page. For this option, you can customize the content of the page in an HTML editor or as custom code. To pass values dynamically, insert parameters with the parameter picker. Learn more about parameters.
Configuring notifications
You can also configure notifications, which are automatic messages sent to the app users who submitted records with Submission Form DataPart. They can be used, among others, to inform app users about successful data submission or further steps they should take after submitting a form.
To configure notification emails in your Submission Form:
- In the right panel, select Notifications.

- Click Add.
- Fill in the following fields:
- From – sender email address.
Note: Sender email address must be verified in the account settings.
- To – email address of the notification recipient.
- Subject – subject line of your email
In the To field, you can use parameters to dynamically pass values from the data source fields.
- Configure the message body. You can do it in an HTML editor or as custom code. To pass values dynamically, insert parameters with the parameter picker. Learn more about parameters.
- Select Save.