With the Details/Update Form DataPart you can display, edit, and delete a single record from a data source table or view.
Steps to create Details/Update Forms
- Select fields.
-
- In the upper panel, select the Add elements button.
- Select Forms > Details/Update Form.
- In the Data source panel, select a table or view that will be the primary data source for your DataPart.
- From the Available fields panel, select the fields you want to use in your form. To do that, click the field or drag and drop it into the Selected fields section. You can bulk-add all the fields by clicking the Select all button.
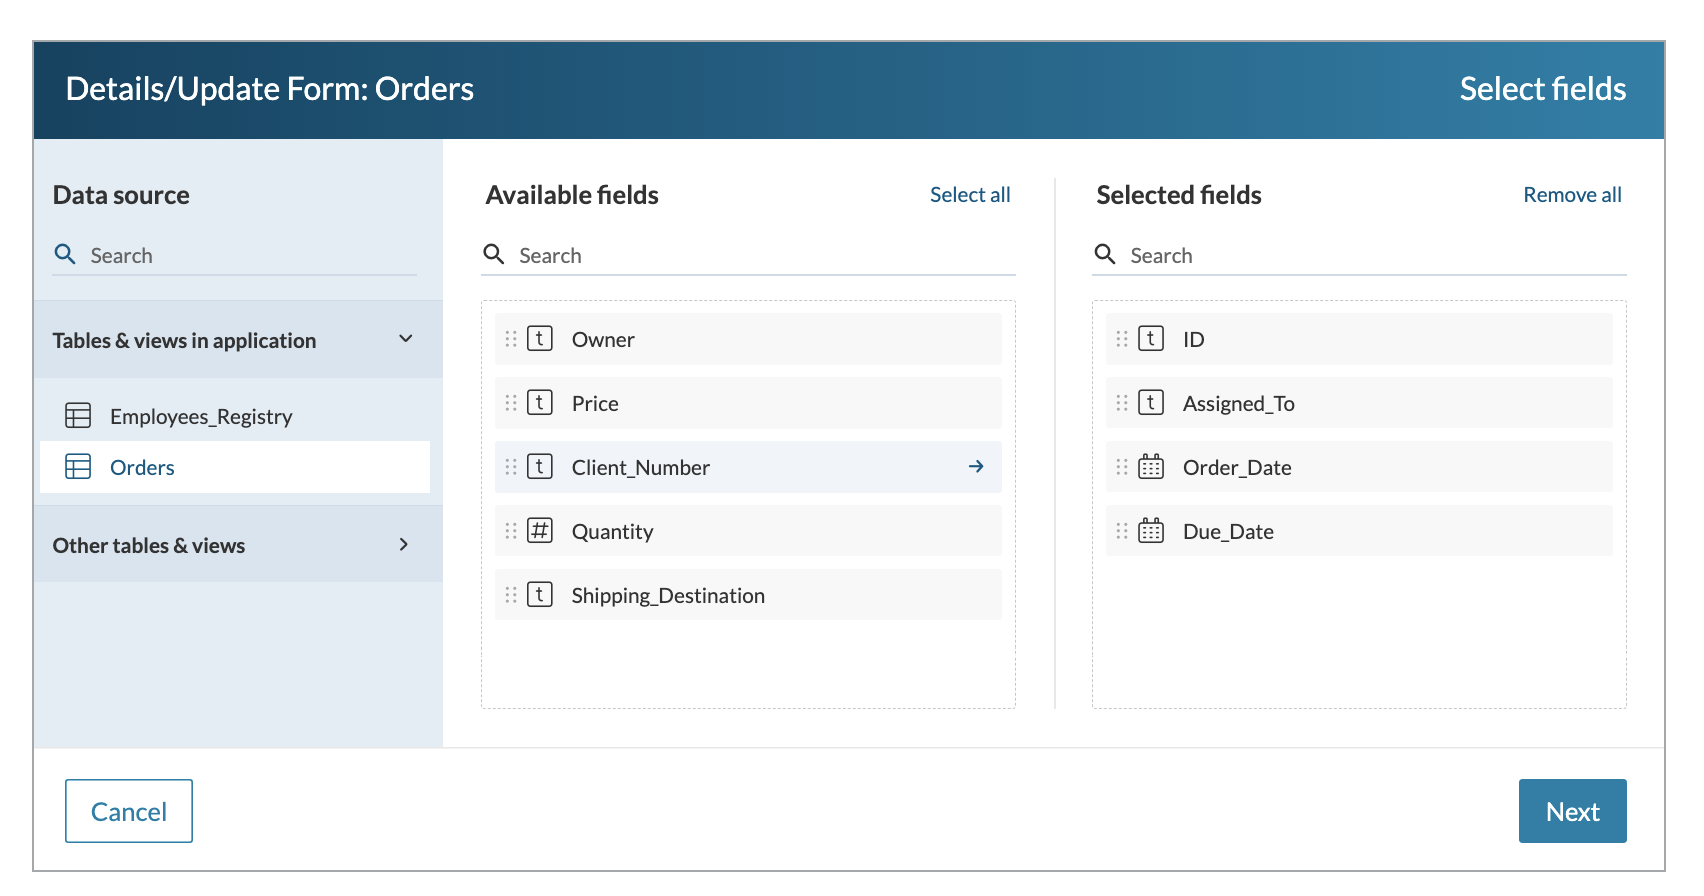
- Select Next.
Note: For the Next button to be available, at least one field must be selected.
- Optional: Configure sections in which you want to display groups of fields:
- In the Elements panel, click Add > Section and select the new section.
- On the General tab, enter the section heading and description to display on the form.
- On the Layout tab, select the number of columns in which you want to display the fields. The columns are of equal width.
- For each section that you want to display, repeat steps a. through c.
- Rearrange the order of sections using drag-and-drop.
- Configure fields:
- In the Elements panel, select a field.
- In the General and Layout tab, fill in additional parameters. The options available depend on the selected form element. Learn more.
- Rearrange the order of fields in sections and columns using drag-and-drop.
- Once the configuration is ready, click Save.
- Optional: Add an HTML block to your form to personalize it with such elements as headers, hyperlinks, or visuals:
- In the Elements panel, select Add > HTML block.
- Configure the block style and content. Learn more about HTML block.
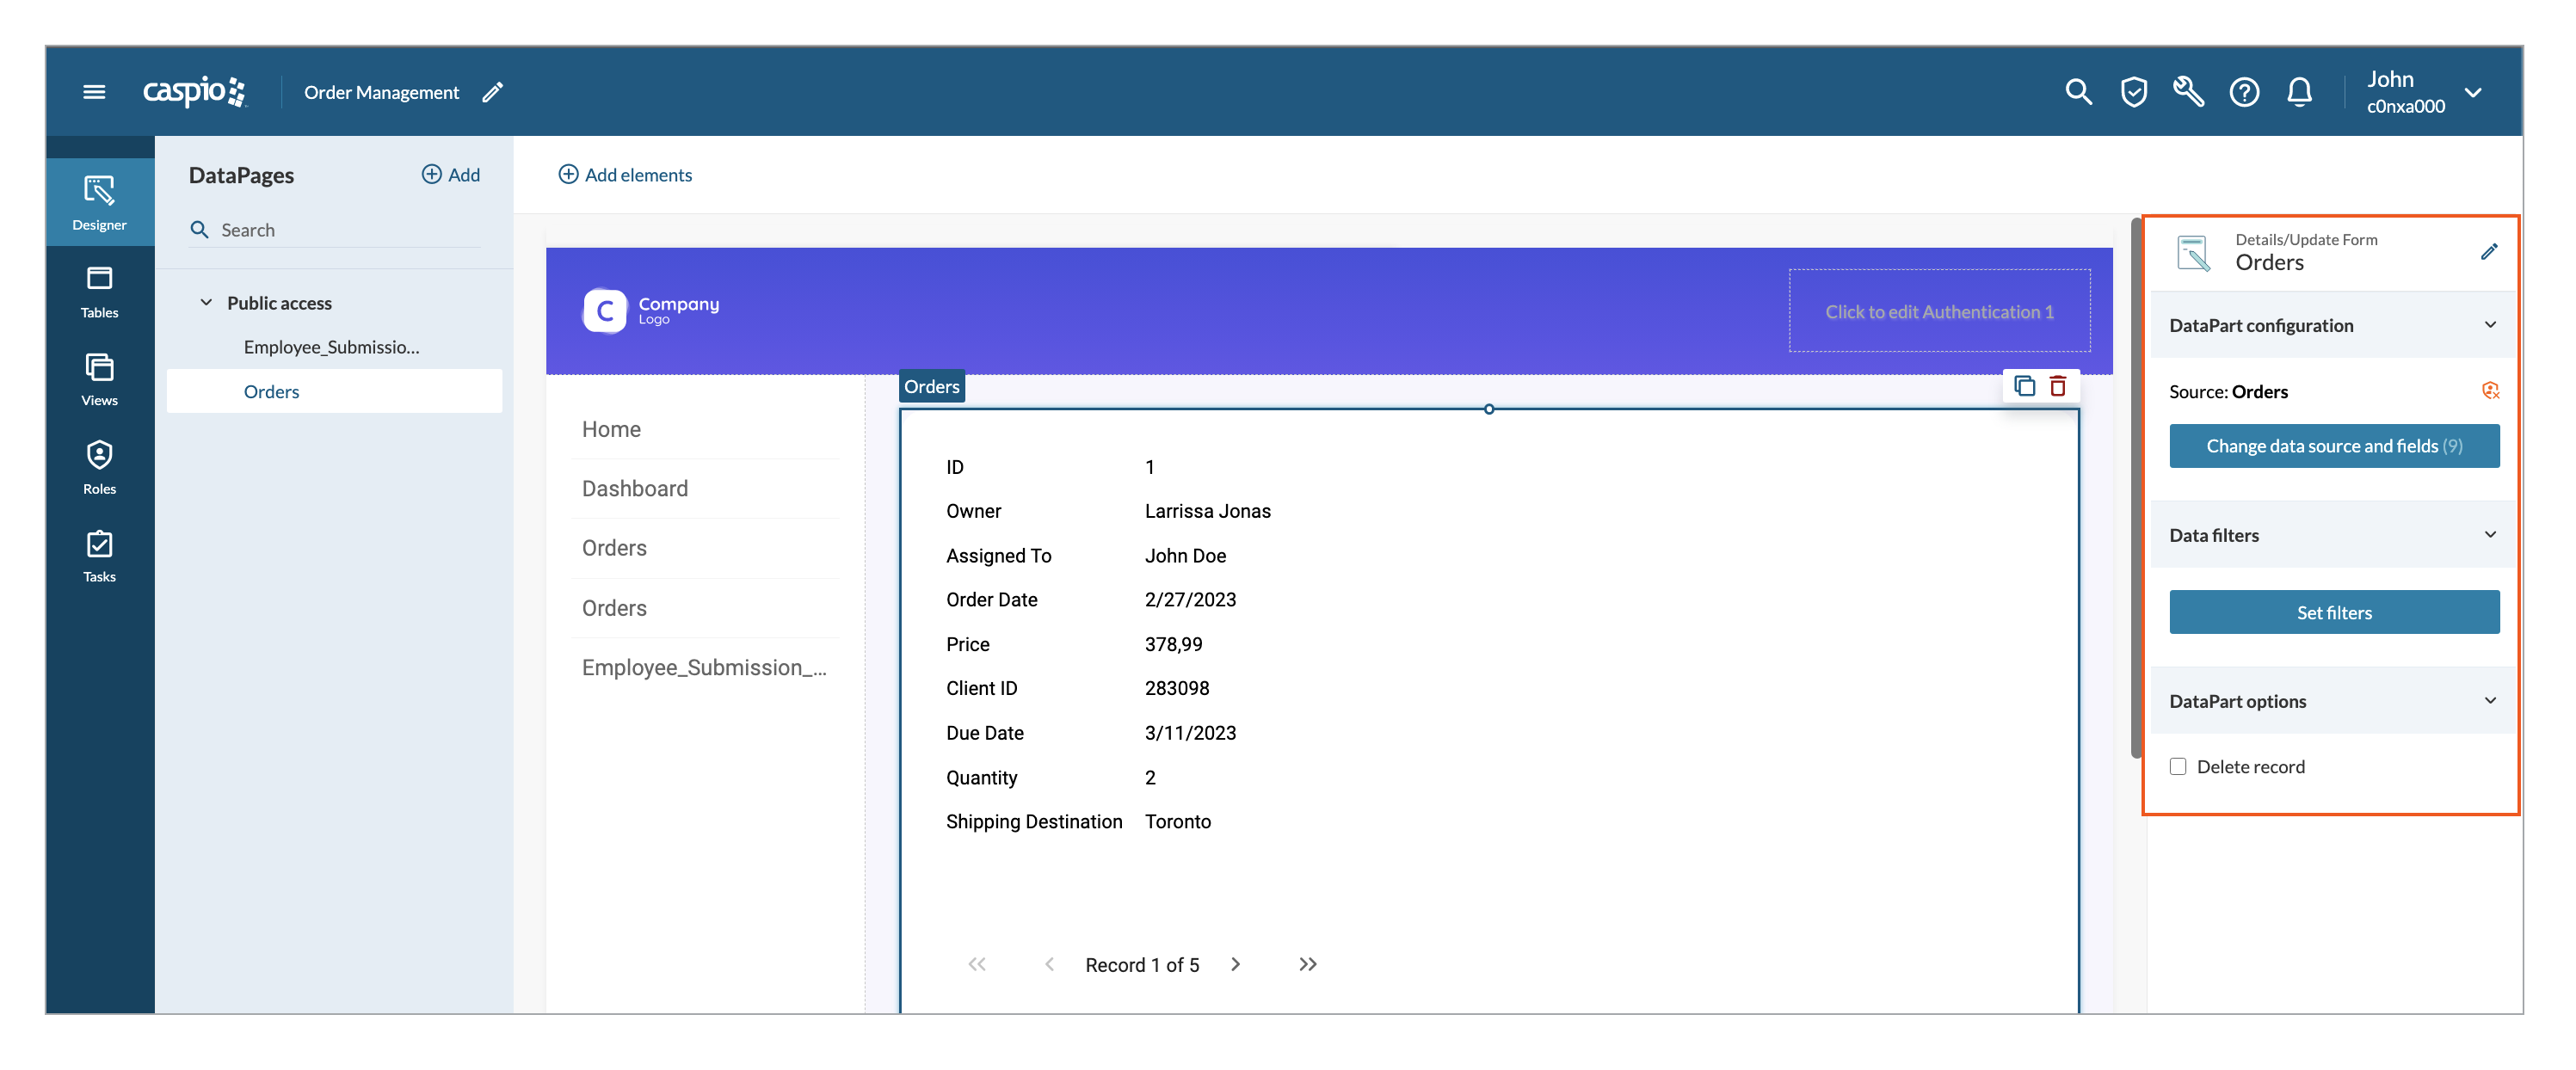
Configuring additional options for Details/Update Forms
After creating an Details/Update Form, in the right panel, you can configure additional options. The following configurations are available:
Configuring notifications
You can also configure notifications, which are automatic messages sent to the app users upon data update or deletion.
To configure notification emails in your Details/Update Form:
- In the right panel, select Notifications.
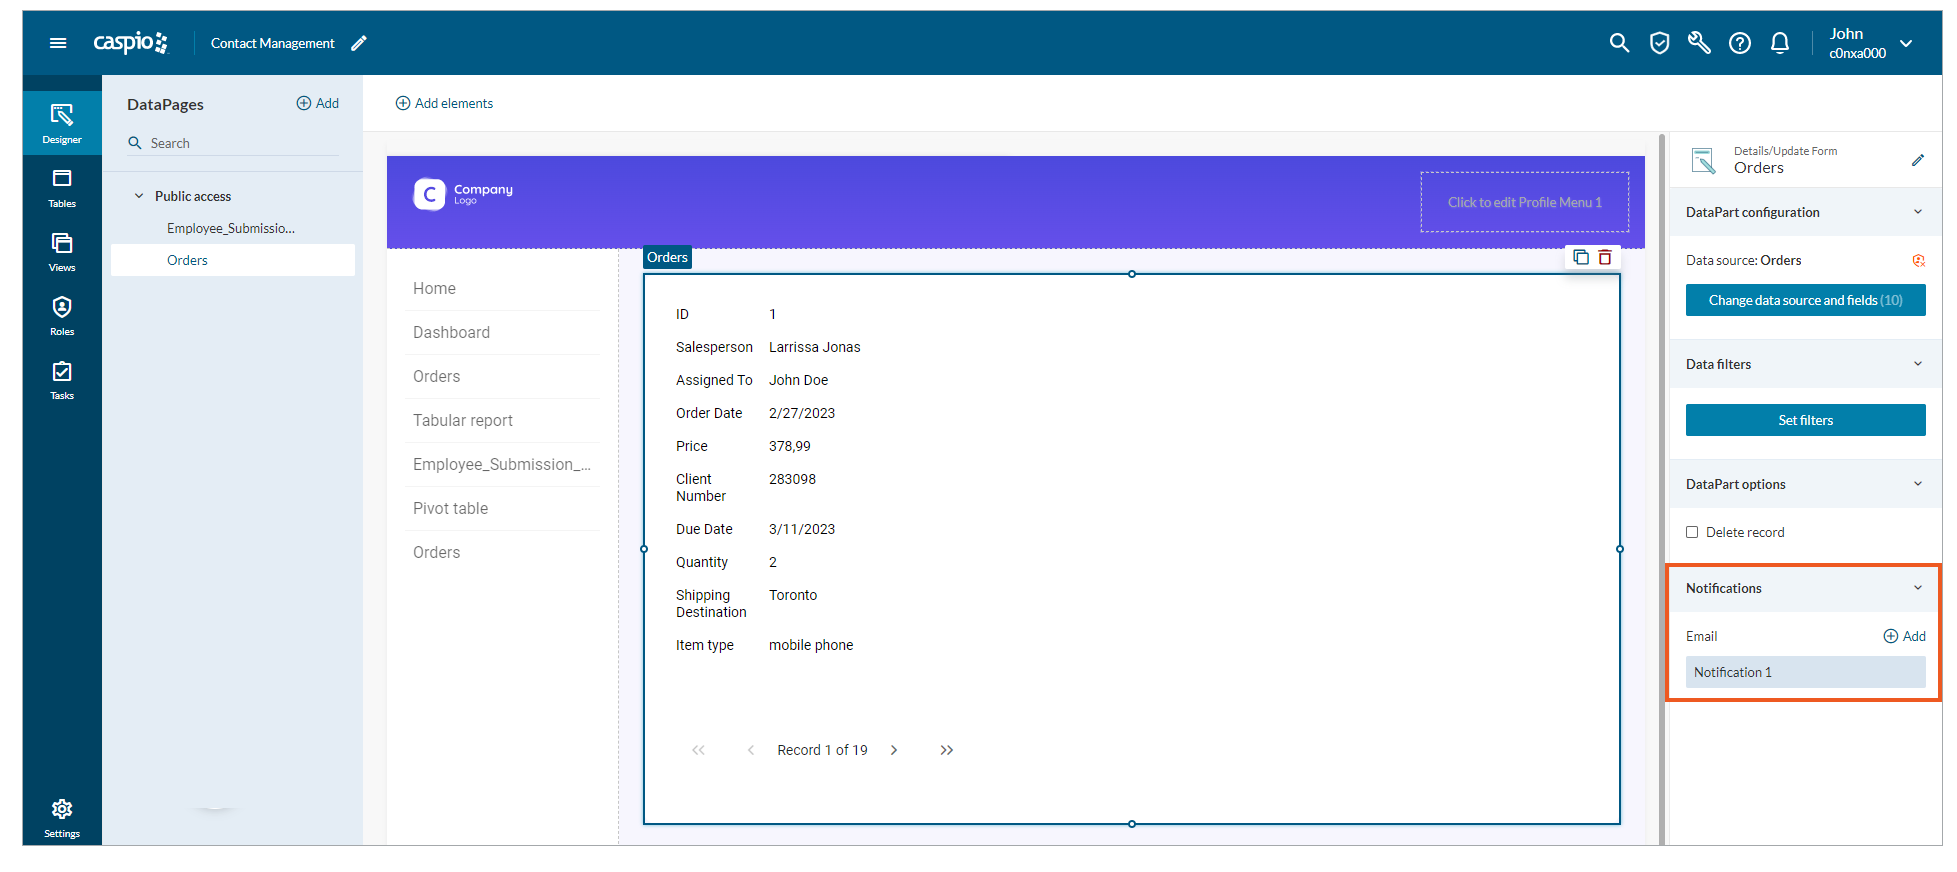
- Click Add.
- Select upon which action you want to notify a user: Update and/or Delete.
- Fill in the following fields:
- From – sender email address.
Note: Sender email address must be verified in the account settings.
- To – email address of the notification recipient. You can enter more than one email address. In the To field, you can use parameters to dynamically pass values from the data source fields.
- Subject – subject line of your email .
- Configure the message body. You can do it in an HTML editor or as custom code. To pass values dynamically, insert parameters using the parameter picker. Learn more about parameters.
- Click Save.